
Transform Videos with Filmora's Color Grading Tools
Elevate your video editing with Filmora's powerful color grading tools. Achieve cinematic tones and vibrant colors effortlessly, whether you're a beginner or a pro. Learn how to enhance storytelling and create mood with intuitive sliders and advanced adjustments. Unlock your creative vision today!
VIDEO EFFECTS
4/11/20266 min read
Video Color Grading
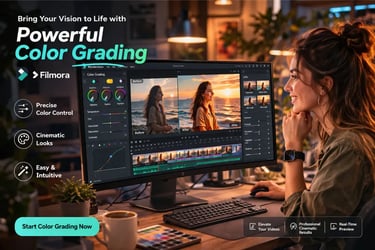
Transform your videos with Filmora Video Editor’s powerful color grading tools. Achieve Cinematic tones, Vibrant colors, and perfect Mood control with intuitive sliders, LUTs, and advanced adjustments. Whether you're a beginner or pro, Filmora makes professional-quality color correction fast and effortless. Elevate every frame, enhance storytelling, and bring your creative vision to life with stunning, studio-grade Video Color Grading.

Introduction to Color Grading in Filmora
Video color grading is where your footage truly comes to life. It’s not just about fixing colors, it’s about creating mood, emotion, and storytelling through visuals. Filmora makes this powerful technique accessible even for beginners. With its intuitive interface and professional-grade tools, you don’t need years of editing experience to produce cinematic results. Whether you want warm sunset tones, cool dramatic shadows, or vibrant travel visuals, Filmora gives you full control. As a beginner, you might feel overwhelmed by terms like saturation, contrast, or LUTs. But Filmora simplifies everything into easy-to-use sliders and visual tools. You can instantly see changes in real time, helping you learn faster. This guide will walk you step-by-step through the process, showing you not just how to use the tools, but how to think creatively while grading your videos for maximum impact.
Why Color Grading Matters in Video Editing
Color grading is what separates average videos from professional-looking content. Even if your footage is shot on a basic camera, proper grading can dramatically improve its quality. It enhances lighting, corrects color balance, and adds a unique style that makes your video stand out. Filmora allows you to achieve all of this without needing complex software. For beginners, this is a game-changer. Instead of struggling with technical workflows, you can focus on creativity. Imagine turning a dull clip into a vibrant travel vlog or giving your short film a cinematic feel with just a few adjustments. That’s the power of color grading. More importantly, color grading helps tell your story. Warm tones can evoke happiness and nostalgia, while cooler tones create tension or mystery. Filmora gives you the tools to control these emotions effortlessly, making your videos more engaging and memorable for your audience.
Getting Started with Filmora’s Color Grading Tools
When you open Filmora and import your footage, you’ll find the color grading tools neatly organized in the editing panel. Simply select your clip and navigate to the “Color” tab. This is where all the magic happens. Filmora provides a clean layout with sections like Basic, HSL, Curves, and Color Wheels. For beginners, start with the Basic panel. Here, you’ll find sliders for brightness, contrast, saturation, and temperature. These are the foundation of any color grade. Adjust them slowly while previewing your video to understand their effect. Filmora also includes real-time previews, so you can instantly see your changes. This makes learning much easier compared to traditional editing software. The goal here is not perfection, but experimentation. Play with the controls, observe how your footage changes, and build confidence as you go.
Understanding Basic Color Grading Adjustments
Before diving into advanced color grading techniques, mastering the basics is essential. Filmora’s basic controls include brightness, contrast, saturation, and white balance. These simple adjustments can dramatically improve your footage. Brightness controls how light or dark your video appears, while contrast defines the difference between light and dark areas. Increasing contrast often makes your footage look sharper and more dynamic. Saturation adjusts the intensity of colors—boost it for vibrant visuals or reduce it for a muted, cinematic feel. White balance, which includes temperature and tint, ensures your colors look natural. If your footage looks too blue or too yellow, adjusting the temperature slider can fix it instantly. Filmora makes these adjustments incredibly beginner-friendly. You don’t need technical knowledge—just use your eyes. Aim for natural-looking colors first, then move toward creative enhancements once you’re comfortable with these controls.
Using LUTs for Instant Cinematic Looks
One of Filmora’s most powerful features is LUTs (Look-Up Tables). LUTs are preset color profiles that instantly transform the look of your video. For beginners, this is the fastest way to achieve professional results without manual adjustments. Filmora offers a variety of built-in LUTs, including cinematic, vintage, and travel styles. Simply apply a LUT to your clip and watch the transformation happen instantly. You can then fine-tune the intensity to match your preference. What makes LUTs so valuable is their ability to create consistency across your entire video. Instead of grading each clip individually, you can apply the same LUT to maintain a cohesive look. For beginners, start by exploring different LUTs and observing how they change the mood of your footage. This will help you understand color grading styles and inspire your own creative direction.
Mastering the HSLPanel
The HSL (Hue, Saturation, Lightness) panel in Filmora allows you to control specific colors in your video. This is where you move from basic correction to creative precision color grading . For example, if your sky looks dull, you can increase the saturation of the blue tones without affecting the rest of the image. Similarly, you can adjust skin tones to make them look more natural or vibrant. The Hue slider changes the actual color, saturation controls intensity, and lightness adjusts brightness for each color range. Filmora makes this process simple with labeled color sections, so you always know what you’re adjusting. For beginners, this tool might seem advanced, but it’s incredibly rewarding. Start small—pick one color and experiment. Over time, you’ll gain confidence and learn how to enhance specific elements in your footage for a polished, professional look.
Enhancing Videos with Color Wheels and Curves
Color wheels and curves are where Filmora truly shines for creative control. These color grading tools let you adjust highlights, midtones, and shadows separately, giving your video a cinematic depth. Color wheels allow you to add color tones to different parts of your image. For example, you can add warm tones to highlights and cooler tones to shadows, creating a cinematic contrast. Curves, on the other hand, let you fine-tune brightness and color channels with precision. For beginners, start with small adjustments. Slight changes can have a big impact. Filmora visual interface helps you understand these tools quickly, making them less intimidating. These advanced features are what elevate your videos from basic edits to professional productions. Once you start using them, you’ll notice a dramatic improvement in the overall quality and style of your work.
Creating Mood and Story Through Color
Color grading isn’t just technical, it’s artistic. The colors you choose directly influence how your audience feels. Filmora empowers you to experiment with different moods effortlessly. Warm tones like orange and yellow create a happy, nostalgic feeling, perfect for travel or lifestyle videos. Cooler tones like blue and teal add drama and intensity, ideal for cinematic storytelling. Filmora makes it easy to test different looks until you find the perfect match for your story. You can combine LUTs, HSL adjustments, and color wheels to create unique styles that reflect your creative vision. As a beginner, think about the emotion you want to convey before you start grading. This will guide your choices and help you create more impactful videos that resonate with your audience.
Tips for Beginners: Color Grading Professional Results
To get the best results with Filmora color grading, start simple and build your skills gradually. Avoid over-editing, subtle adjustments often look more professional than extreme changes. Always compare your graded footage with the original to ensure improvements. Use LUTs as a starting point, then refine with manual adjustments. Pay attention to skin tones, as they are crucial for natural-looking videos. Filmora’s real-time preview makes it easy to spot mistakes and correct them instantly. Another important tip is consistency. Apply similar grading across all clips to maintain a cohesive look. Filmora allows you to copy and paste settings, saving time and effort. With practice, you’ll develop your own style and workflow. The key is to experiment, learn from your edits, and keep improving with each project.
Conclusion: Transform Your Videos with Filmora
Filmora’s color grading feature is a powerful tool that turns beginners into creators. It combines simplicity with professional capabilities, making it one of the best choices for anyone starting their video editing journey. By mastering basic adjustments, exploring LUTs, and experimenting with advanced tools like HSL and color wheels, you can transform ordinary footage into stunning visuals. Filmora removes the complexity of traditional editing software, allowing you to focus on creativity and storytelling. If you want your videos to stand out, color grading is essential—and Filmora makes it easier than ever. Start today, experiment boldly, and watch your videos evolve into cinematic masterpieces that captivate and inspire your audience.