
Editing Face in Video
Editing Face in Video is very easy. Open Filmora video editor, import your video, select the clip, use the “Face-off” effect or “Mosaic” tool under Effects, adjust size and position, then apply smoothing or filters to enhance features and reduce imperfections.

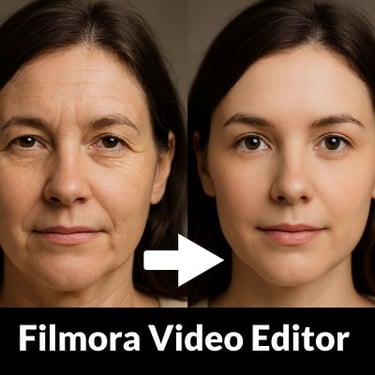
Introduction to Filmora Face Editing in Video
Wondershare Filmora AIVideo Editor is one of the most popular tools for beginners who want to edit videos without feeling overwhelmed by complex software. Filmora AI Video Editor combines a user-friendly interface with powerful features, making it ideal for tasks like face editing in video and applying beauty filters. When working with video, especially personal or social media content, enhancing facial appearance is often a priority. Filmora AI Video Editor's face editing in video provides built-in tools that allow you to smooth skin, brighten tones, and even reshape facial features subtly. Unlike other professional-grade editors that require steep learning curves, Filmora AI Video Editor simplifies the process into a few clicks. This accessibility makes it perfect for beginners who want polished results without advanced technical knowledge. In this article, we’ll explore step-by-step how to edit faces in videos using Filmora AI Video Editor, understand the beauty filter in detail, and learn how to maximize its potential for professional-looking content.
Face Editing in Video: Install Wondershare Filmora
Before diving into face editing in video, the first step is setting up Filmora AI Video Editor on your computer. Wondershare Filmora Video Editor is available for both Windows and macOS, and installation is straightforward. You can Download_Filmora_AI_Video_Editor Software, where you’ll find option for a free trial versions. Once installed, launching Filmora AI Video Editor presents you with a clean dashboard that includes options like “New Project” or “Open Project.” For beginners, starting with a new project is the best way to explore the tools. Importing your video is simple: Drag and Drop the file into the media library or use the “Import” button. Filmora AI Video Editor supports a wide range of video formats, so compatibility is rarely an issue. Having your video ready in the timeline is essential before applying any facial edits or beauty filters. This preparation ensures that you can focus entirely on the editing process without technical interruptions.
Face Editing in Video: Filmora Timeline and Interface
Filmora AI Video Editor’s timeline is where most of the face editing in video magic happens. It’s a horizontal strip at the bottom of the interface where you place your video clips, audio, and effects. For face editing in video, you’ll primarily work with the video track. Beginners should familiarize themselves with basic timeline functions such as trimming, splitting, and zooming in on specific sections. These tools allow you to isolate the portions of the video where facial adjustments are needed. The preview window above the timeline shows real-time changes, which is crucial when applying beauty filters. On the left side, you’ll find menus for effects, transitions, and elements. The “Effects” tab is particularly important because it houses the beauty filter options. By understanding how the timeline and interface work together, you’ll gain confidence in navigating Filmora AI Video Editor for face editing in video. This foundation ensures that when you start face editing in video, you can focus on creative adjustments rather than struggling with navigation.
Beauty Filter for Face Editing in Video
The beauty filter for face editing in video in Filmora AI Video Editor is designed to enhance facial features automatically. It’s a built-in effect that smooths skin, brightens complexion, and reduces imperfections like blemishes or uneven tones. Unlike manual editing, where you would adjust brightness, contrast, and saturation individually, the beauty filter bundles these enhancements into one tool. Beginners will appreciate its simplicity: you apply the filter to your video clip, and Filmora AI Video Editor instantly improves facial appearance. However, the filter is not just a one-click solution. It comes with adjustable parameters that allow you to control the intensity of the effects of face editing in video. This means you can choose between a subtle enhancement or a more dramatic transformation depending on your project’s needs. Understanding the beauty filter for face editing in video is essential because it forms the backbone of face editing in video for Wondershare Filmora AI Video Editor. It’s the tool that makes your video look polished and professional without requiring advanced editing skills.
Download_Filmora_AI_Video Editor
Applying the Beauty Filter for Face Editing in Video: Step by Step
To apply the beauty filter for face editing in video in Filmora AI Video Editor, start by selecting the video clip in your timeline. Navigate to the “Effects” tab on the left side of the interface. Within the effects library, look for the “Beauty” category. Drag the beauty filter onto your video clip in the timeline. Instantly, you’ll notice changes in the preview window, skin appears smoother, and facial features look more refined. But the real power lies in customization. Double-Click the video clip to open the editing panel, where you’ll find sliders for adjusting the face editing in video and beauty effects. These sliders typically include options for skin smoothing, tone adjustment, and brightness. Beginners should experiment with small adjustments first, observing how each slider affects the face. The goal is to enhance natural beauty without making the video look artificial. Once satisfied, click “OK” to apply the changes. This simple process transforms your video into a polished piece with improved face editing in video.
Face Editing in Video: Skin Smoothing and Tone Adjustment
One of the most important aspects of face editing in video is skin smoothing. Filmora AI Video Editor’s beauty filter includes a slider that reduces visible pores, wrinkles, and blemishes. Beginners should be cautious not to overuse this feature, as excessive smoothing can make the face look unrealistic. A moderate adjustment usually achieves a natural glow. Tone adjustment is another critical parameter. It allows you to brighten or darken the skin tone to match the overall lighting of the video. For example, if your video was shot in dim lighting, increasing the tone brightness can make the face more visible and appealing. Conversely, reducing brightness can prevent overexposure in well-lit scenes. These adjustments are particularly useful for maintaining consistency across different face editing in video projects. By mastering skin smoothing and tone adjustment, beginners can ensure that their videos present faces in the most flattering and professional manner possible.
Face Editing in Video: Brightness and Contrast
Beyond face editing in video, skin smoothing and tone, brightness and contrast play a significant role in enhancing facial features. Filmora AI Video Editor’s beauty filter for face editing in video often integrates these adjustments automatically, but you can fine-tune them manually. Brightness controls how light or dark the face appears, while contrast defines the difference between highlights and shadows. Increasing contrast can make facial features like eyes and lips stand out more prominently. Beginners should experiment with subtle changes, as drastic adjustments can distort the natural look of the face. For instance, too much brightness may wash out details, while excessive contrast can create harsh shadows. The preview window is your best guide, observe how face editing in video adjustment affects the overall appearance and aim for balance. When combined with skin smoothing and tone adjustments, brightness and contrast ensure that the face looks vibrant, clear, and naturally appealing in your video.
Download_Filmora_AI_Video Editor
Face Editing in Video: Correcting Imperfections
The beauty filter for face editing in video is particularly effective at correcting imperfections in video footage. Common issues include uneven skin tone, minor blemishes, or dull complexion caused by poor lighting. Filmora AI Video Editor's face editing in video beauty filter automatically detects facial areas and applies corrections, but you can refine these adjustments manually. Beginners should focus on subtle corrections rather than complete transformations. For example, if a subject has a small blemish, the filter can reduce its visibility without erasing it entirely. This approach maintains authenticity while improving aesthetics. Another useful feature is the ability to balance facial tones across different clips. If your video includes multiple scenes shot under varying conditions, the beauty filter ensures consistency in facial appearance. Correcting imperfections with the beauty filter for face editing in video is not about creating a flawless look, but about enhancing natural beauty. By using the filter thoughtfully, beginners can produce videos that look polished while still retaining the individuality of the subject’s face.
Face Editing in Video: Customization of Beauty Effects
While the default beauty filter for face editing in video settings are helpful, Filmora AI video editor allows advanced customization for users who want more control. Double-clicking the video clip opens a detailed editing panel where you can adjust multiple parameters. These include skin smoothing intensity, tone brightness, eye enhancement, and even face reshaping in some versions. Beginners may find these face editing in video options overwhelming, but experimenting with each slider helps build confidence. For instance, increasing eye enhancement can make eyes appear brighter and more engaging, which is useful for close-up shots. Face reshaping tools subtly adjust jawlines or cheekbones, though they should be used sparingly to avoid unnatural results. Advanced customization is where creativity meets technical skill. By learning how each parameter affects facial appearance, beginners can tailor the beauty filter for face editing in video, to match their project’s style. This flexibility ensures that your video editing is not just automated but personalized to your vision.
Combin Beauty Filter for Face Editing in Video with Other Effects
Filmora AI Video Editor's beauty filter for face editing in video works best when combined with other video effects. For example, adding a soft light overlay can complement skin smoothing, creating a warm and inviting look. Transitions between clips can also enhance the overall flow, ensuring that facial edits don’t appear abrupt. Beginners should explore the “Effects” library beyond the beauty filter, experimenting with color grading, vignette, or blur effects. These can add depth and focus to facial features. Another useful combination is pairing the beauty filter for face editing in video with audio enhancements. Clear, crisp sound complements polished visuals, making the video more engaging. The key is balance, avoid overloading your video with too many effects, which can distract from the subject’s face. By strategically combining the face editing in video with other tools, beginners can create professional-quality videos that highlight facial features while maintaining a cohesive and visually appealing style.
Download_Filmora_AI_Video Editor
Face Editing in Video: Exporting and Sharing
Once you’ve applied the beauty filter for face editing in video and customized facial edits, the final step is exporting your video. Filmora AI Video Editor makes this process simple. Click the “Export” button, and you’ll be presented with options for format, resolution, and destination. Beginners should choose formats like MP4, which are widely compatible with social media platforms and devices. Resolution settings depend on your project, 1080p is standard for most uses, while 4K is ideal for high-quality content. Filmora AI Video Editor also offers direct export to platforms like YouTube and Vimeo, saving time for creators who want to share instantly. Before exporting, preview your video thoroughly to ensure that facial edits look consistent across all clips. Face Editing in Video when shared is when your effort pays off. Share with your friends, followers, or clients will see polished content that reflects your creativity. By mastering the export process, beginners can confidently showcase their work to the world.